
Saturday, August 3, 2013
3rd Grade - Hide the Word - January - Ephesians 4:31-32
3rd Grade - Hide the Word - January - Ephesians 4:31-32

Also before class, print out the word strips that are on the teal paper. These are the words from the verse. In class, discuss the verse and together, glue the teal word strips onto the correct side of the poster. Then give each child 4 post-its. Have each child 2 trash attitudes and 2 treasure attitudes on the post-its. Then let the kids come up and stick their post-its on the correct side of the poster.
Hang in the hall so that all the parents can see their child's work and be proud!
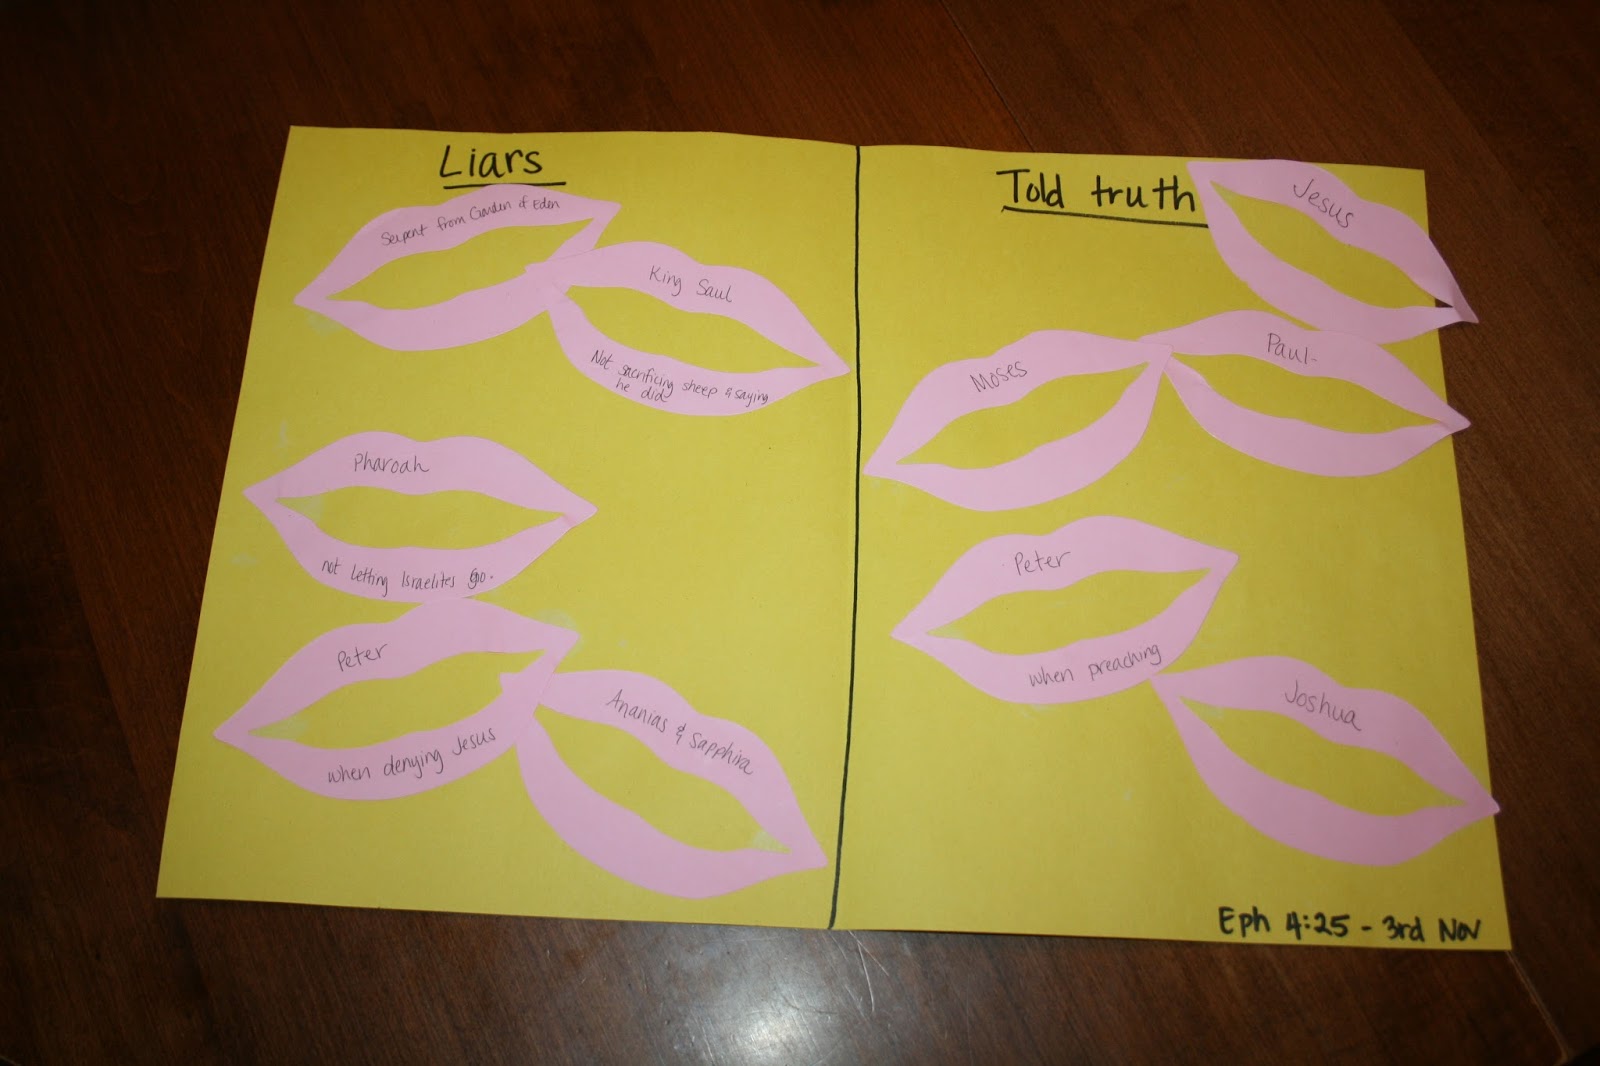
3rd Grade - Hide the Word - November - Ephesians 4:25
This is another in class activity for November - Ephesians 4:25. For the sample we used 12x18 construction paper, but in class we recommend using a length of butcher paper. Before class, die-cut several lips. In the sample we used the Ellison die-cut machine, but Cricut also has lips on several cartridges. Each child needs 4 and the teacher needs at least 4. We also recommend writing the full verse at the top of the poster.


3rd Grade - Hide the Word - October - Ephesians 4:23-24

To prepare, decide which butterfly shape you want to use. They write a verse phrase on each butterfly. Since these kids are fluent readers, you may want to only put one or two words per shape. Place in a baggie with the scripture reference written on it and mail.
3rd Grade - Hide the Word - November - Ephesians 4:25
This verse focuses on putting off falsehoods and speaking truthfully. Take 2 paper plates. Label one “speak truthfully” and the other “falsehoods.” As a class, generate a list of examples for both and record the responses on construction paper. Cut up the list of responses. Distribute response strips evenly among the kids and have the kids glue strip onto correct plate.


Using plates to sort adds an added "aaaahhhh" factor and makes it something new!
Friday, August 2, 2013
3rd Grade - Hide the Word - July - 1 Corinthians 10:24

3rd Grade - Hide the Word - October - Eph. 4:23-24 Butterfly Footprints
Ephesians 4:23-24 – to
be made new in the attitude of your minds; and to put on the new self, created
to be like God in true righteousness and holiness.
This is one of those crafts that mommas will save and have hanging up on their walls forever! Many have developed their own footprint methods. We bring sponge brushes, the paint and a lot of baby wipes. Sit the kids in a chair and the teacher is sitting on the floor. Paint the child's foot, then firmly press in the foot down on the paper that is laying on the ground. Make sure to press each little toe! Gently lift the foot. The teacher then gives the foot a good wipe-down with a baby wipe. Then give the child a baby wipe and let them go sit somewhere else make sure they got all the paint off their foot.
This craft can be done in a variety of colors, but we liked the neutral look best.


This sample is of a 15 month olds foot, so you may need the paper to be turned vertical. Try it first at home.
3rd Grade - Hide the Word - July- 1 Corinthians 10:24 Mail-out Game

3rd Grade Hide the Word - July - 1 Corinthians 10:24

In class, have the kids write the verse using a white crayon, silver Sharpie or glitter marker. Then they can affix star stickers. On the spy-scope, the kids write the scripture reference.
Elijah Windsock from 2 Kings
We made these windsocks in our summer program this year. The age range is 2-9 and all the kids really had fun making them!
To prepare, I cut posterboard into 8 inch x 24 inch strips. Then I printed the word "Elijah" in a large outline font. I copied one coloring sheet of Elijah in the chariot of fire for each child. I trimmed it to be about a 6x6 inch square. The kids started by coloring in the name and coloring sheet of Elijah in the chariot.


Monday, July 29, 2013
Jacob and Esau sort

In class we were learning about Jacob and Esau. We talked about their differences. I made pocket chart cards to sort in the pocket chart during our lesson. Then for our craft, each child got a 12x18 piece of construction paper and 2 paper doll die-cuts. They made one look like Jacob and one look like Esau. They also labeled each side and glued on the man. The word strips were pre-cut and in baggies. We would all search for the same strip then glue it on the correct side.
Hide the Word - organization
We think in folders and spreadsheets! To organize of Hide the Word materials for first grade, we made a file box. The whole year of verses fits in this box. At first we also kept the 3-D leftovers, but it got too full. Each blue tab is a new month.


Hide the Word - supply box
As you begin making games each month, you will have some leftovers. This is not the best way to store them, but it is what we have for now with the space we have available. It is a fairly large basket from Michael's. Inside we have each month's leftovers in a gallon baggie. Within the gallon baggies, there are also sandwich baggies with smaller pieces.


Hide the Word - record keeping race track
There are oodles of different ways to keep records of your children who say their memory verses. In our three year old class, they use this adorable race track. The track goes around the whole room! The cars are an Ellison die-cut, but I'm sure Cricut has a car too!


Jericho activity

This year when we learned about the battle of Jericho, we got to act it out in a new way! I got little army men from the dollar store and a bunch of mini marshmallows. As a class, we built the town of Jericho out of big and little marshmallows. Then we each took our army men and walked around the city, one time for six days. Then on day seven, God knocked down the walls (read Mrs. Kim jiggled the table) and the army men took the city. Each child got to bring home a baggie of men and marshmallows. I can attest to the fact that 6 year old boys LOVE this and will almost drive their mommas crazy telling and retelling this Bible account with their baggie of fun!
Tower of Babel craft
This craft came mostly from pinterest too! In class, we built a tower together and the kids were allowed to talk and communicate verbally. Then we told them to build a tower again, but this time, they had to be silent. This was HARD!!!

I did not get a good photo, but if you look behind this child, you will see a brown circle. This is cut in a spiral. We also printed a sentence and cut it up for the kids to clue onto the spiral. This took a while. Next time, we will write some of the words and leave blanks for the cut-up words.


These last two photos show the Tower up close so you can see the word strips a little better.


Tower of Babel words - Again, when we do this again, we will do a fill in the blank instead of having the children glue all the words on the tower.
We didn't have time to glue cotton ball clouds to the top of the tower, but hope we'll get time to do so next year!
Noah food craft
Noah is one of those topics that there are a zillion ideas for! I wanted to do something new, so I turned to pinterst for help. This came straight from pinterest and the kids loved it!
First we painted half a paper plate to the the rainbow. Some kids painted with their fingers, others used q-tips.


Days of Creation Step Book
We made the coolest step book for days of creation! Before class, I assembled the books and gathered the supplies for each page. Then the we all worked together to make the booklet.


At the bottom of each step, I glued a strip that said "On day ___, God made ____." To save time, I filled in the blanks before xeroxing them. Here's what went on each page...
Day 1 - black square of paper and white square of paper
Day 2- cotton ball clouds
Day 3- grass strip at bottom that the kids cut along the top to make it "fring-y", tree trunk and tree top die-cut, flower foam stickers
Day 4 - sun and moon die-cut, glitter star stickers
Day 5 - torn-edge strips to be water, fish stickers in the water and bird die-cuts in the sky
Day 6 - various animal die-cuts to choose room (lion, camel, cow, cat, dog, etc) and everyone got one man
Day 7 - empty
Subscribe to:
Comments (Atom)